How to build an advanced OData Query
This article guides users through the process of creating complex OData queries.
Table of Contents
The OData Advanced Query builder is a wizard that enables you to build an OData query that will pre-filter the data required for running reports/analysis/etc. in external analysis tools, such as Excel and PowerBI.
Why do I need an OData query?
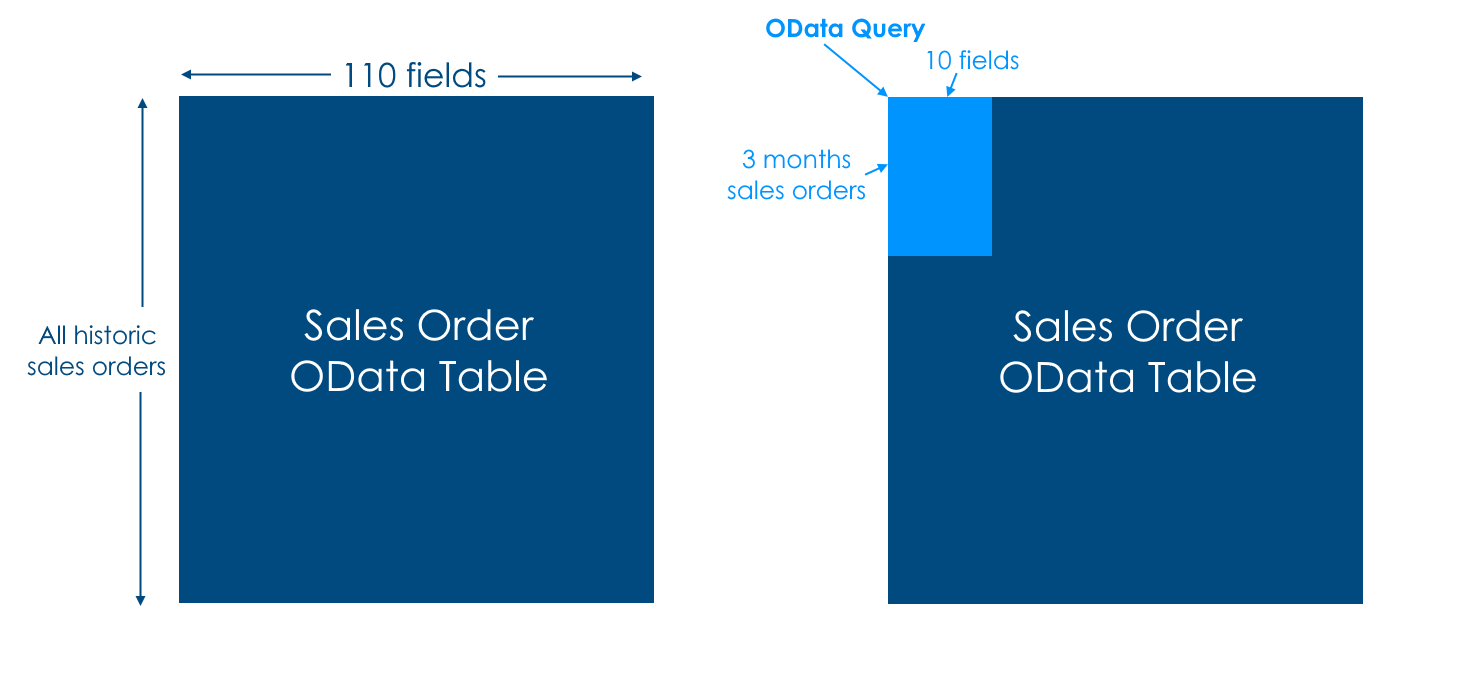
By default you can extract all the data from an OData table (customer, supplier, product, sales orders, etc.) into a reporting/analysis tool like Excel. This will bring all the fields and all the records into the tool, and you can then use the tool to filter the results and select the fields you wish to use.
By using an OData query the filtering is done on the Merchanter cloud server, so a much smaller set of data is transmitted to your report/spreadsheet, making it faster to run, download and putting less impact on other users of your system.

How to create a new OData query
- Go to the ‘Reports’ menu
- Select ‘Advanced Analysis’
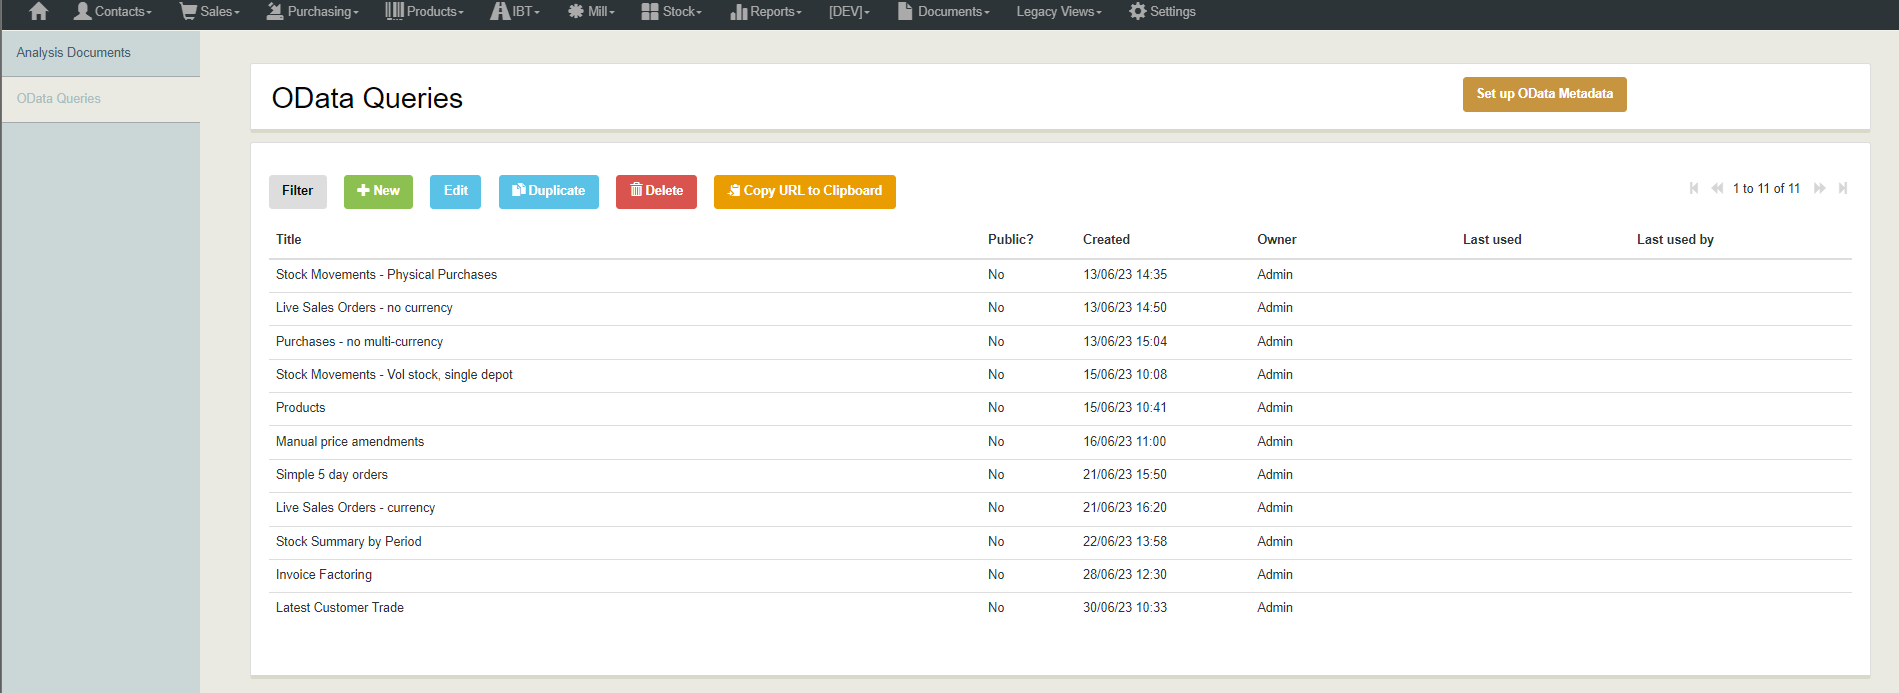
- In the left hand menu select ‘OData Queries’
This will show a list of any existing OData Queries

- Click on ‘+ New’ to open an new query wizard
Step 1 - Select the service and resource
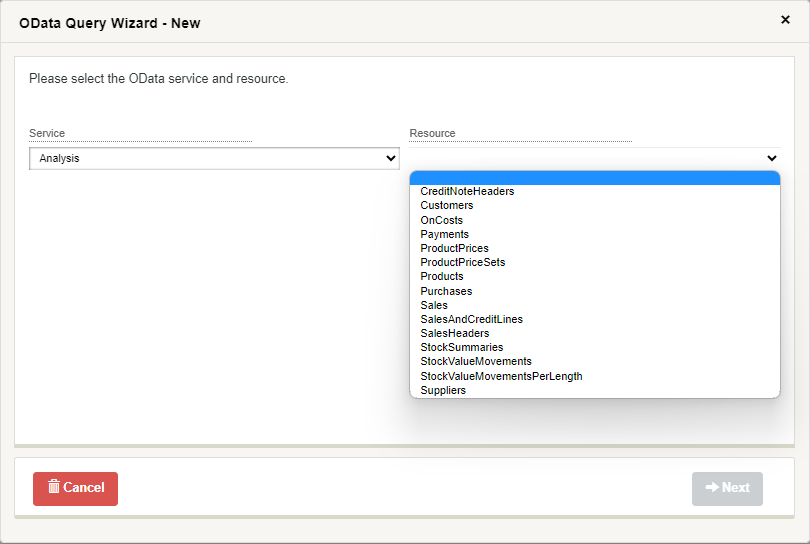
- Select the Service you require - At present there is only one service available called ‘Analysis’, so this is preselected. This may gain additional services in the future
- Select the Resource you require - this is the OData table that the query is based on
(This example will use the Sales table)
- When you have selected a Service and Resource the ‘Next’ button will be highlighted green
Step 2 - apply attribute filters
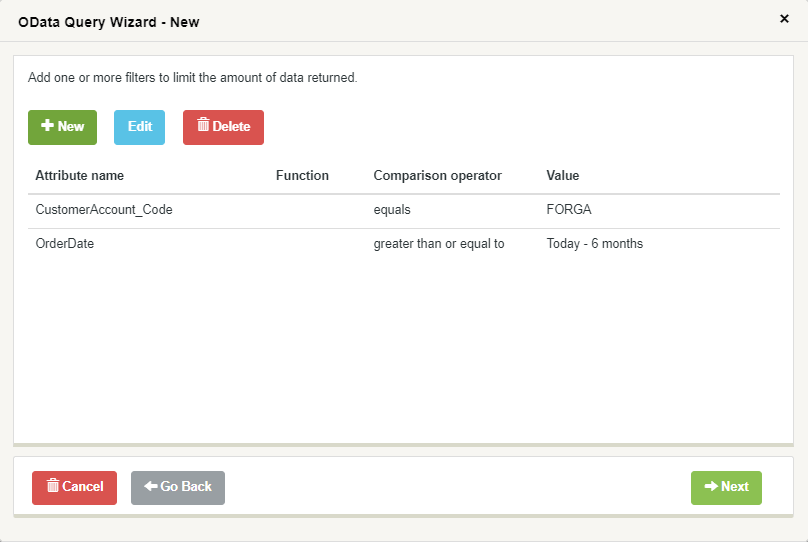
If you wish to filter the rows of data that the query will return, you can add multiple filters to the query. In this example we will limit sales to those for a customer (Forest Gate Builders: FORGA) and from the last 6 months.
New filter - filter by customer code
- Click on ‘+ New’ button
- Select the Attribute (field) that you wish to filter by (in this case ‘CustomerAccount_Code’)
- Select the Comparison operator - the method of filtering (in this case ‘equals’)
- equals
- does not equal
- greater than
- less than
- greater than or equal to
- less than or equal to
- enter the appropriate value (in this case ‘FORGA’)
- Click ‘Save’
New filter - filter by order date
- Click on ‘+ New’ button
- Select the Attribute (field) that you wish to filter by (in this case ‘OrderDate’)
- Select the Comparison operator - the method of filtering (in this case ‘greater than or equal to’)
- Select Value type (in this case ‘Today +/- n months’)
- literal - a specific date
- Today +/- n days - today's date with a number of days in the future (+) or past (-)
- Today +/- n weeks - today's date with a number of weeks in the future (+) or past (-)
- Today +/- n months - today's date with a number of months in the future (+) or past (-)
- Today +/- n years - today's date with a number of years in the future (+) or past (-)
- enter the N value (in this case ‘-6’ which will give 6 months in the past from today)
- Click ‘Save’

Version 1 of Query Builder doesn't have lookups
In the first version of the query builder there are not lookups on the attributes, you will need to type in the correct value.
How do I find the correct value? - there are two ways to lookup the correct values, either look at the appropriate record in the Merchanter system (useful for things like customer/supplier/product codes), for system fields like order status start an Excel query by putting in the standard full data table query and when it shows the sample data click the ‘Transform Data’ button. This will take you to Power Query, where you can see sample data for all the fields and see how the relevant data is held in the database.
Step 3 - selecting attributes (fields)
From step 3 you can choose which fields you wish to bring into your spreadsheet/report.
By default all attributes will be included in the query.
To make a selection of fields click the ‘Select all attributes?’ selector to ‘No’
Selecting specific attributes
- use the tick boxes (check boxes) next to each of the fields to select if it should be included in the query
- use the tick box at the head of the column to select or deselect all of the fields
- HINT - it is often easier to deselect all the fields and pick the ones you want to include
When you have the attributes you require click ‘Generate URL’ button
Step 4 - saving and using the OData query
Step 4 of the wizard shows the finished OData query, which you can copy and paste to test that it works
Copy URL to Clipboard button not currently active (Jul 2023)
The amber ‘Copy URL to Clipboard’ button is not currently active as there is an issue with the java function that is accessing the local user clipboard.
To manually copy the query simply highlight the text of the query and either right click and select ‘Copy’ or use the keyboard shortcut CTRL+C
Assuming it works you can either click ‘Cancel’ if this is a one off query and will not be required again, or you can save to reuse
Saving your query
If you wish to save your query to be reused in the future:
- Query title - give a brief text description of the purpose of the query
- Public? - ticking this box will make the query visible to other users of your system who have access to the OData queries
- Click ‘Save & Close’